
How to set up ReplyRabbit
After installing the module, open a mailbox's ReplyRabbit settings, choose an AI provider, paste in your API key, and add your company context. ReplyRabbit then starts drafting replies and suggesting next actions for that mailbox. You can also turn on AI Signals when you want mailbox-list chips for conversations that need faster attention, and Workflow Tags when you want ReplyRabbit-owned FreeScout tags for workflow recipes.
Before you start
Open ReplyRabbit settings
ReplyRabbit is configured per mailbox, so its settings live inside each mailbox's settings screen. In FreeScout, open the mailbox you want to set up, go to its Settings, and choose ReplyRabbit from the settings menu. Every field below is saved for that one mailbox, so different inboxes can use different providers, context, tags, and integrations.
Open the mailbox settings
In FreeScout, select the mailbox you want to configure and open its Settings.Choose ReplyRabbit
In the mailbox settings menu, click ReplyRabbit to open its configuration page.Turn it on
Switch Enable on to activate ReplyRabbit for this mailbox. You can also turn on Auto Draft (New Email) to draft replies automatically when new customer messages arrive, and Auto Actions to generate a next actions checklist automatically.
Choose an AI provider and model
In the AI Provider card, pick a Provider, paste your API Key, and select a Model. ReplyRabbit supports seven providers:
- OpenAI
- Anthropic
- Google AI Studio
- OpenRouter
- Z.AI
- Ollama (Local)
- LM Studio (Local)
The Free tier uses OpenAI only. Paid tiers (Pro and Team) unlock the other six providers, including the local options that keep all data on your own hardware. For help deciding, see Choosing an AI provider.
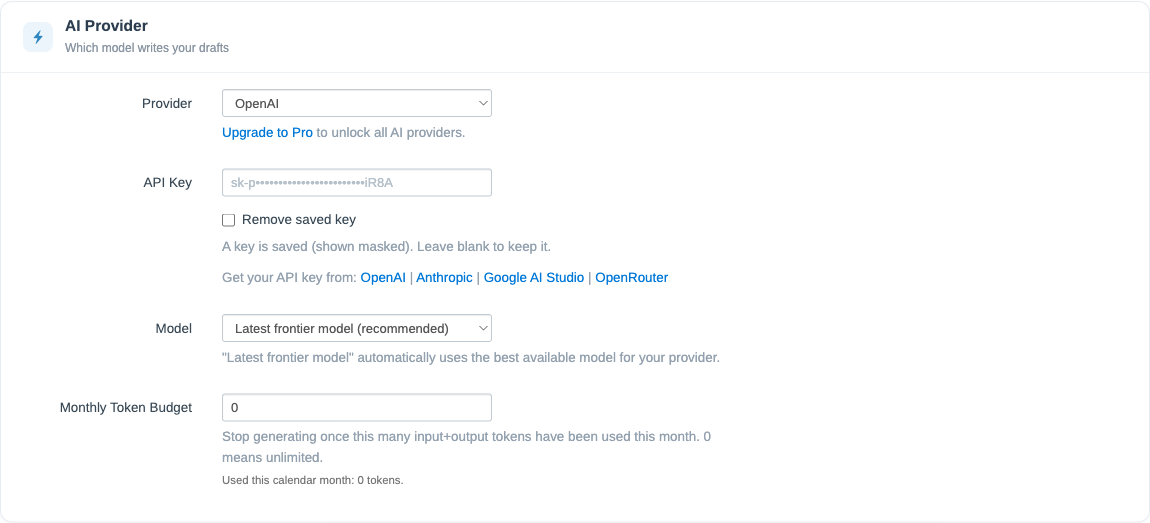
Where to get a key
Prompt caching is automatic
Add your company context
The Response Style card tunes the voice of every draft. Fill in as much as you can so replies sound like your team:
- Company Name is the business the AI mentions in replies (it falls back to the mailbox name if you leave it blank).
- Your Name personalises the sign-off in each draft.
- Your Role gives the AI context about who is replying.
- Business Website can auto-populate the fields below: enter your URL and click Fetch.
- Company Context is factual background about your business, included in every prompt.
- Response Style describes the voice, tone, and rules the AI should follow.
- Examples are a few sample replies that show your preferred style without being copied word for word.
Enable AI Signals
On Pro and Team plans, the AI Signals switch classifies new customer conversations and replies for priority, sentiment, intent, human review, and sales opportunity. Noteworthy results appear as compact chips in the mailbox list, such as Critical, High Priority, Upset, Human Review, or Sales Lead.
AI Signals is off by default. It uses the same AI provider configured for the mailbox. With cloud providers, the conversation content needed for classification is sent to that provider. With local providers such as Ollama or LM Studio, classification stays on your own server. Leave AI Signals off for any mailbox where you only want draft replies and next actions.
Optional: Workflow Tags
The Workflow Tags section turns ReplyRabbit state into FreeScout tags. Turn on Enable workflow sync and Apply FreeScout tags when you want ReplyRabbit to tag conversations from AI Signals, draft readiness, no-reply decisions, and Linear issue state.
The default tag prefix is rr_. You can change the prefix, control whether tags are created automatically, choose whether stale ReplyRabbit-owned tags are removed, set how many recent conversations sync after settings change, and edit the JSON Automation tag map.
If the FreeScout Workflows module is installed and reacts to programmatic tag changes, you can build Workflows recipes around those tags. Without that module, the tags still appear on conversations and in the ReplyRabbit sidebar for agent visibility. For setup details, see FreeScout Workflows integration.
Optional: issue trackers and Slack
Issue tracker and notification settings live in the Integrations section. Choose the active issue tracker for the mailbox, then configure the matching settings:
- Linear: paste your Linear API key, load and select a Team, and pick a Default Status for new tickets.
- GitHub Issues: paste a GitHub Personal Access Token, load repositories, and choose the default repository for new issues.
- Jira: paste your Jira Cloud site URL, account email, and API token, then choose the default project and issue type.
- Slack: paste a Webhook URL to post a notification when supported tracker events happen.
A mailbox uses one active issue tracker at a time. Choose None, Linear, GitHub Issues, or Jira. Switching the selector changes which tracker settings are active for that mailbox.
Issue trackers and your plan
Generate your first draft
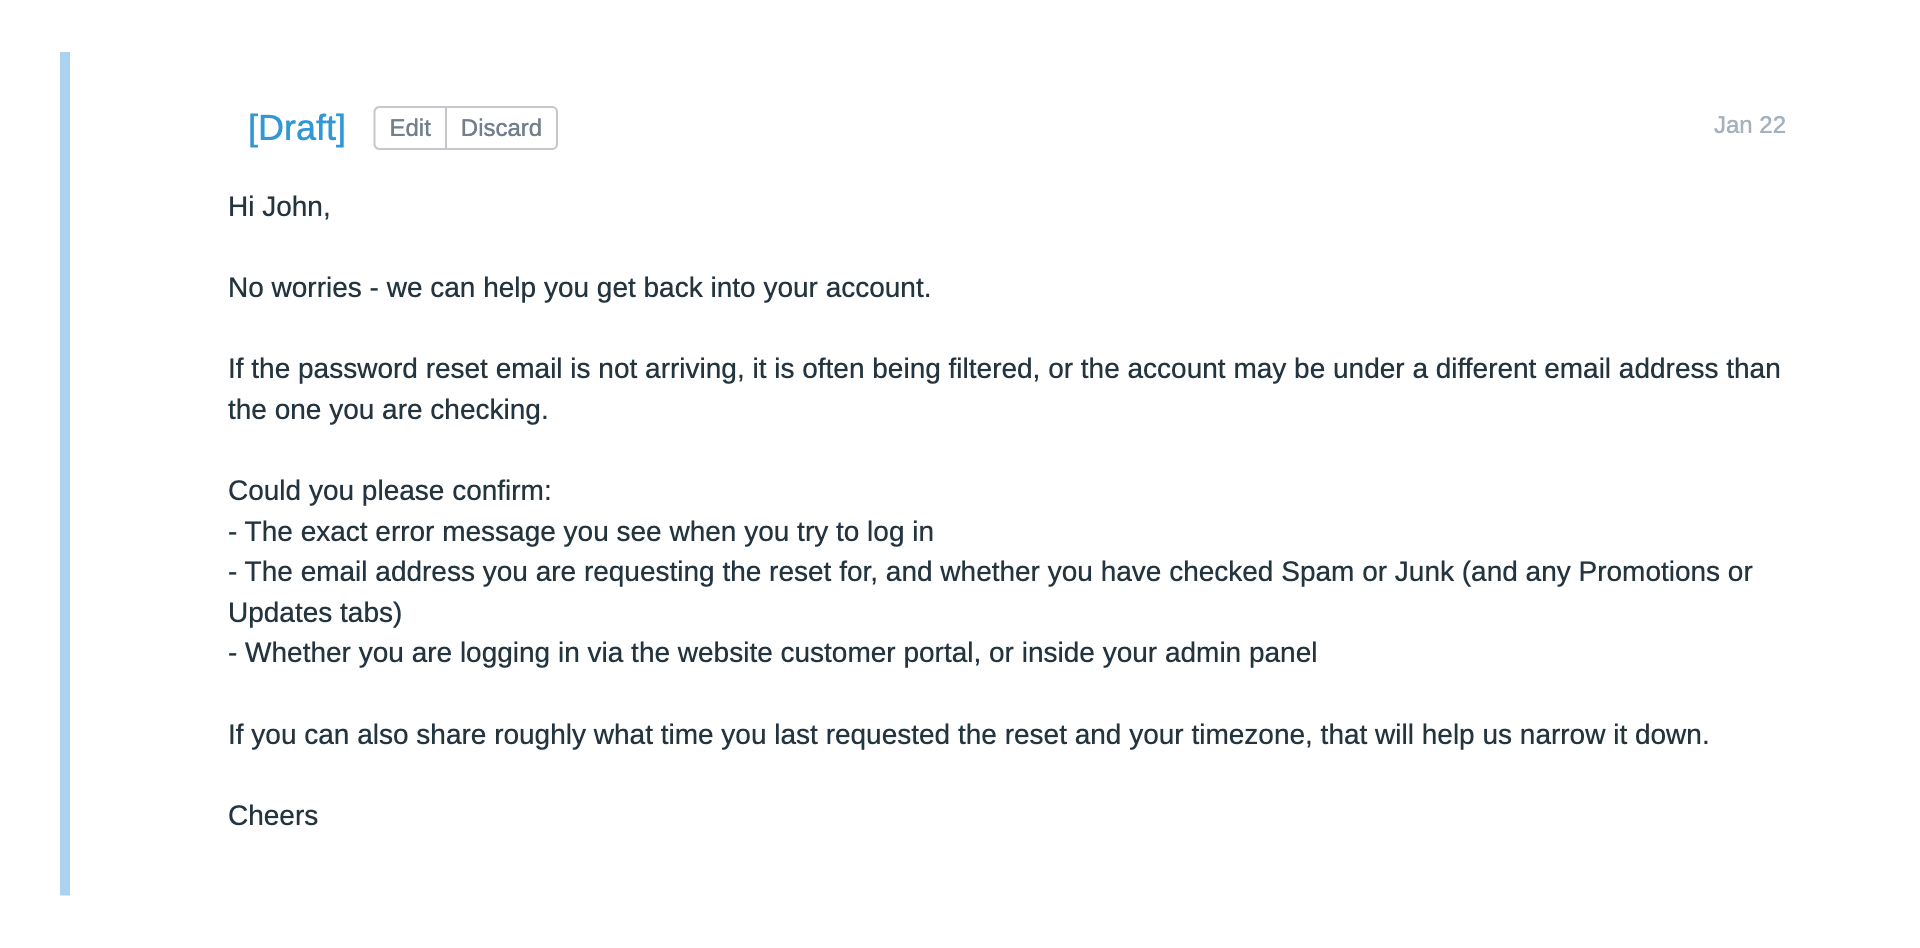
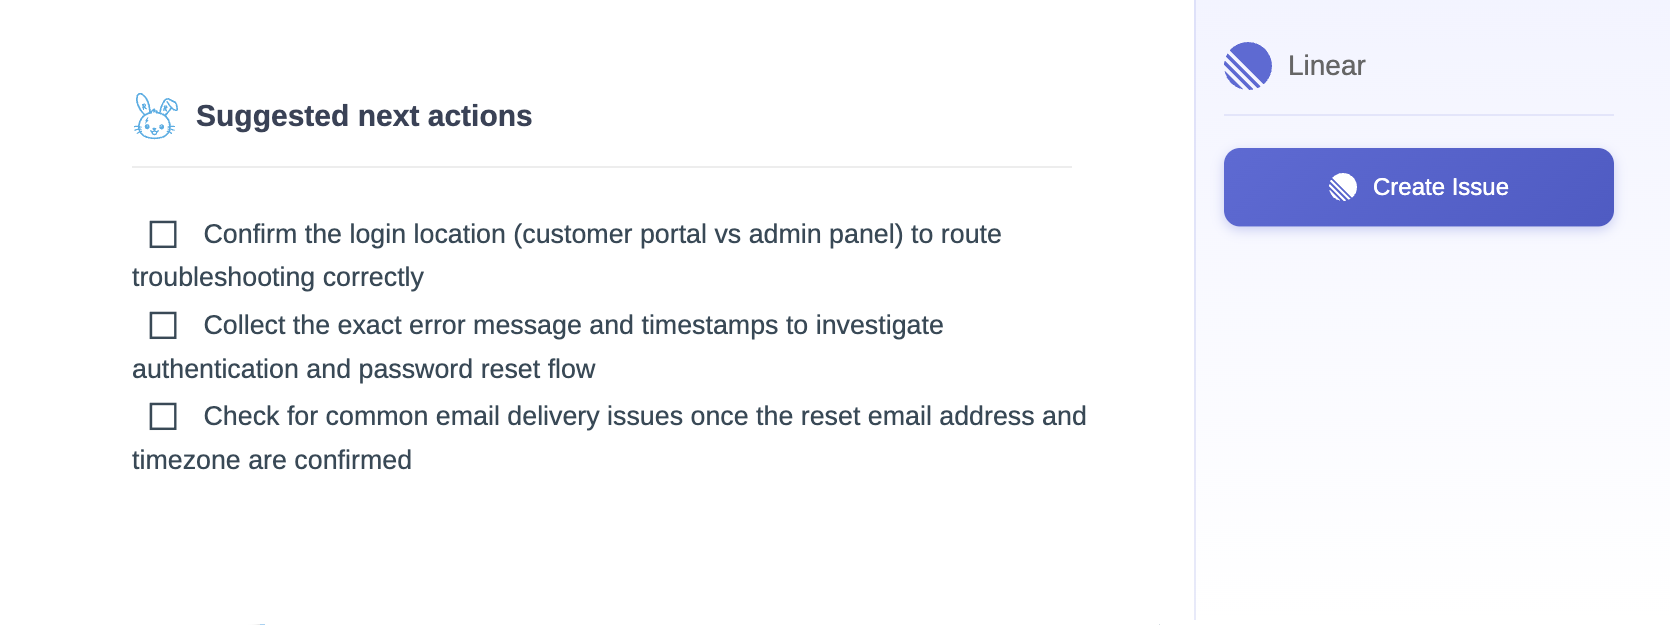
With a provider connected, open any conversation in the mailbox. ReplyRabbit reads the thread and drafts a reply for you to review, edit, and send. It also suggests a short list of next actions for the conversation. Nothing is ever sent automatically: you stay in control of every message.
Next